
Key Takeaways
- Start with the device: Device association lets IT assign a Windows Autopilot device preparation policy directly to a device before enrollment, ensuring the right configuration follows the hardware.
- Device-based assignments take priority: When both user-based and device-based assignments are available, the device-based assignment takes precedence, making deployments more predictable.
- Simplify the OOBE experience: Preconfigure settings such as language and region, keyboard, privacy settings, license terms, device naming, and account-change options to create a smoother out-of-box experience.
- Strengthen device trust: Hardware-based attestation, TPM-backed validation, and UEFI tenant affinity help establish a durable device-to-organization relationship and automatically mark associated devices as corporate-owned.
In this blog post, I’ll walk you through how to pre-associate devices for Windows Autopilot Device Preparation using Microsoft Intune. This feature enables IT administrators to take a more device-centric approach to Windows deployment by associating devices before enrollment, ensuring that the correct device preparation policy and configurations are applied from the very beginning.
Pre-association also streamlines the out-of-box experience (OOBE) by reducing user prompts and simplifying the enrollment process. Additionally, it enhances device trust through hardware-based validation and automatically identifies associated devices as corporate-owned, helping organizations improve device governance, security, and deployment consistency.
Prerequisites
Before proceeding, please ensure that all required prerequisites are configured. The table below provides a clear overview of the Device Association prerequisites.
| Prerequisite | Requirement |
|---|---|
| Device Type | Device association requires a physical device. Virtual machines aren’t supported. |
| Operating Systems | Windows 11, version 25H2 with KB5120998 or later Windows 11, version 24H2 with KB5120998 or later |
| Supported Edition | Windows 11 Pro Windows 11 Pro Education Windows 11 Pro for Workstations Windows 11 Education Windows 11 Enterprise LTSC |
| TPM Requirement | The device must have TPM 2.0 enabled and functioning properly. The TPM must not be operating in Reduced Functionality Mode. TPM attestation is used during device association to verify the identity of the physical device before enrollment. |
Collect Device Diagnostics Logs from Intune
The first and most important requirement for pre-associating a device is the Device Link CSV file. One of the easiest ways to obtain the Device Link CSV from an enrolled device is through Device Diagnostics Logs in Intune. Follow the steps below to collect the Device Diagnostics Logs from Intune and retrieve the required Device Link CSV file. Let’s walk through the process step by step. For this demonstration, I am using the device DESKTOP-HN6LJ62.
- Sign in to the Microsoft Intune admin center
- Navigate to Devices > By Platform > Windows
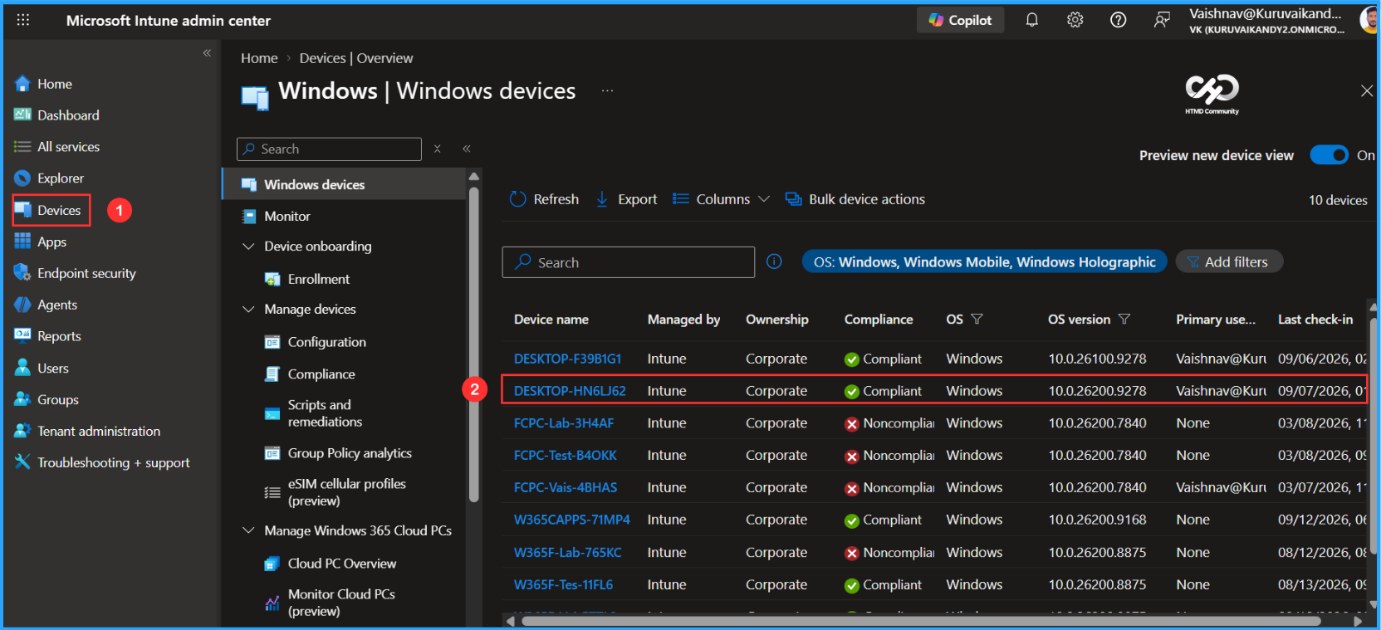
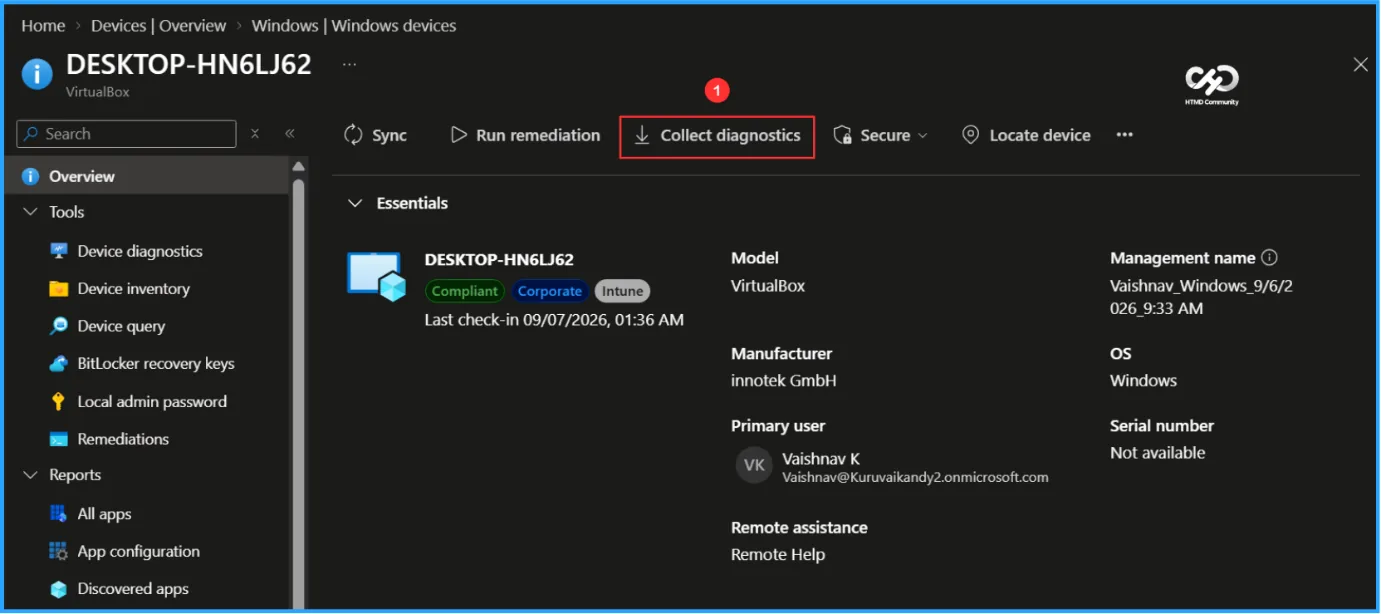
You can now see the new device experience after enabling the Intune Device View Preview option. From the device’s Overview page, select Collect diagnostics from the top menu to initiate the diagnostics log collection.
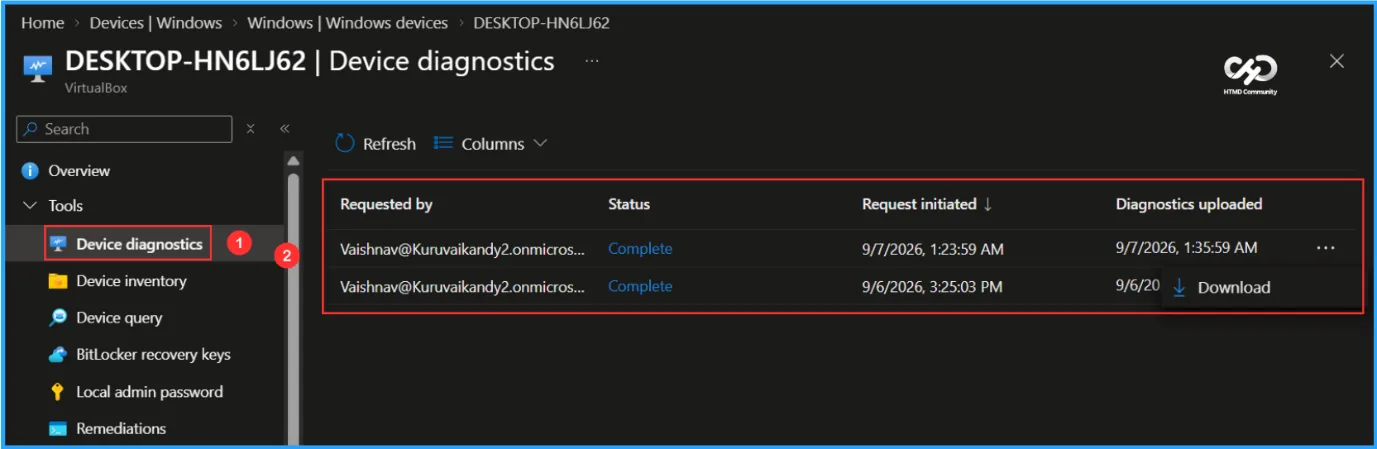
Device diagnostics collection can take several minutes to complete. Ensure that the target device remains online during the process. Once the collection is initiated, go to Tools > Device diagnostics and monitor the status. When the status shows Complete, select the ellipsis (⋯) menu and click Download to retrieve the Device Diagnostics log package.
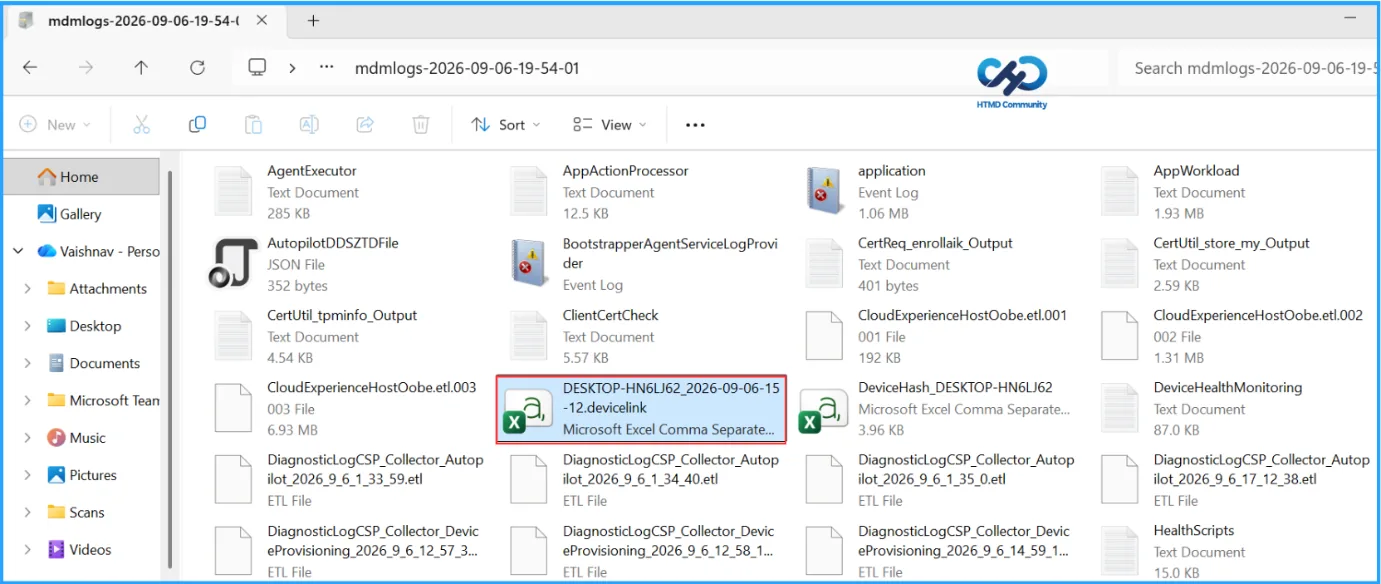
After downloading the Device Diagnostics package, it will be saved as a compressed (ZIP) file. Extract the contents by right-clicking the file and selecting Extract All. Once extracted, browse to the following directory to locate the required files. In this example, the folder path is:
- DiagLogs-DESKTOP-HN6LJ62-20260906T151853Z > (74) FoldersFiles temp_MDMDiagnostics_mdmlogs-2026-09-06-19-54-01_cab > mdmlogs-2026-09-06-19-54-01
Open the CAB file and locate the DESKTOP-HN6LJ62_2026-09-06-15-12.devicelink.csv file. Copy the CSV file and save it to a different folder location. This file will be used in the subsequent steps for device pre-association.
Pre-Associate a Device in Intune through Device Association
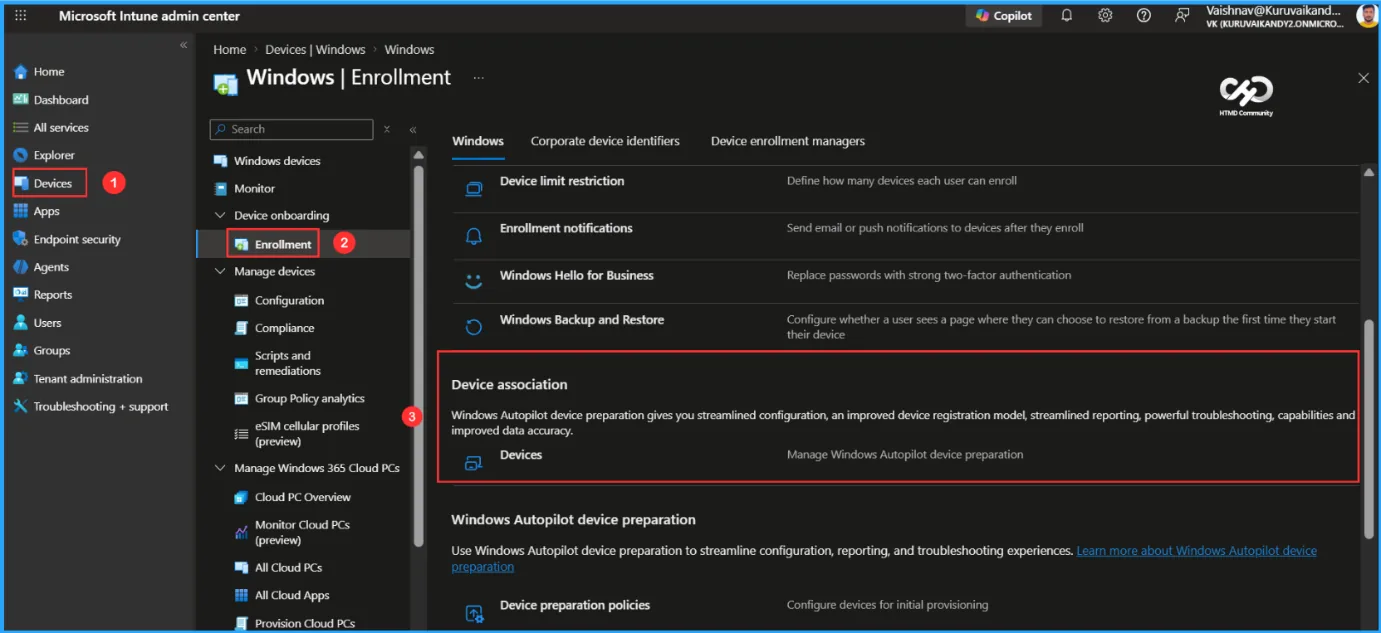
Once you have the Device Link CSV file, you can proceed with device pre-association in Intune. Navigate to Devices > By Platform > Windows > Device Onboarding > Enrollment > Device Association. From there, select Devices to begin the device association process.
Note: Windows Autopilot device preparation provides streamlined configuration, an improved device registration model and reporting, powerful troubleshooting capabilities, and improved data accuracy.
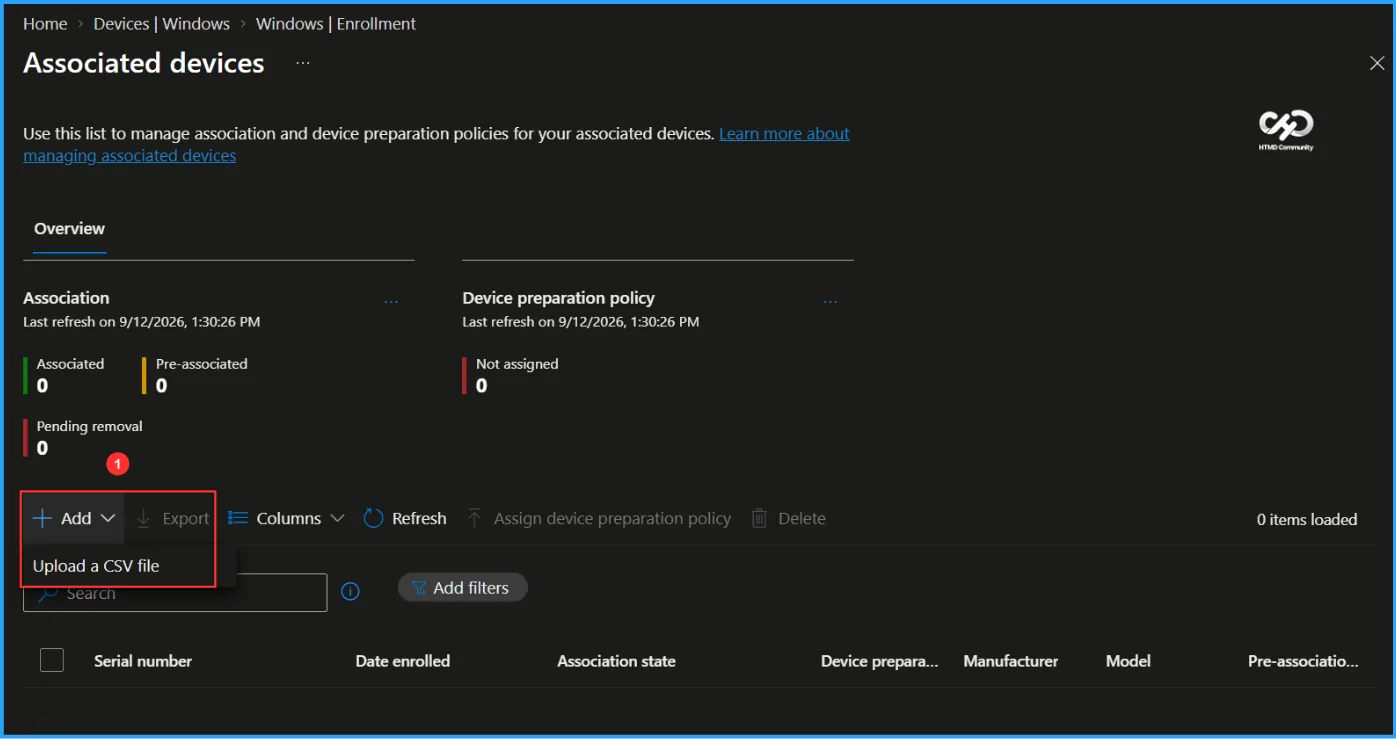
The Associated Devices page is used to manage device associations and device preparation policies. To import a device association, select + Add and choose Upload a CSV file. This option allows you to upload the previously extracted Device Link CSV file and associate the device with Intune.
In the Import CSV Files pane, click + Import CSV, then browse to and select the Device Link CSV file. In this example, the file is DESKTOP-HN6LJ62_2026-09-06-15-12.devicelink.csv. After the upload is completed successfully, you’ll see a notification confirming the import with a message similar to: “DESKTOP-HN6LJ62_2026-09-06-15-12.devicelink.csv uploaded successfully.”
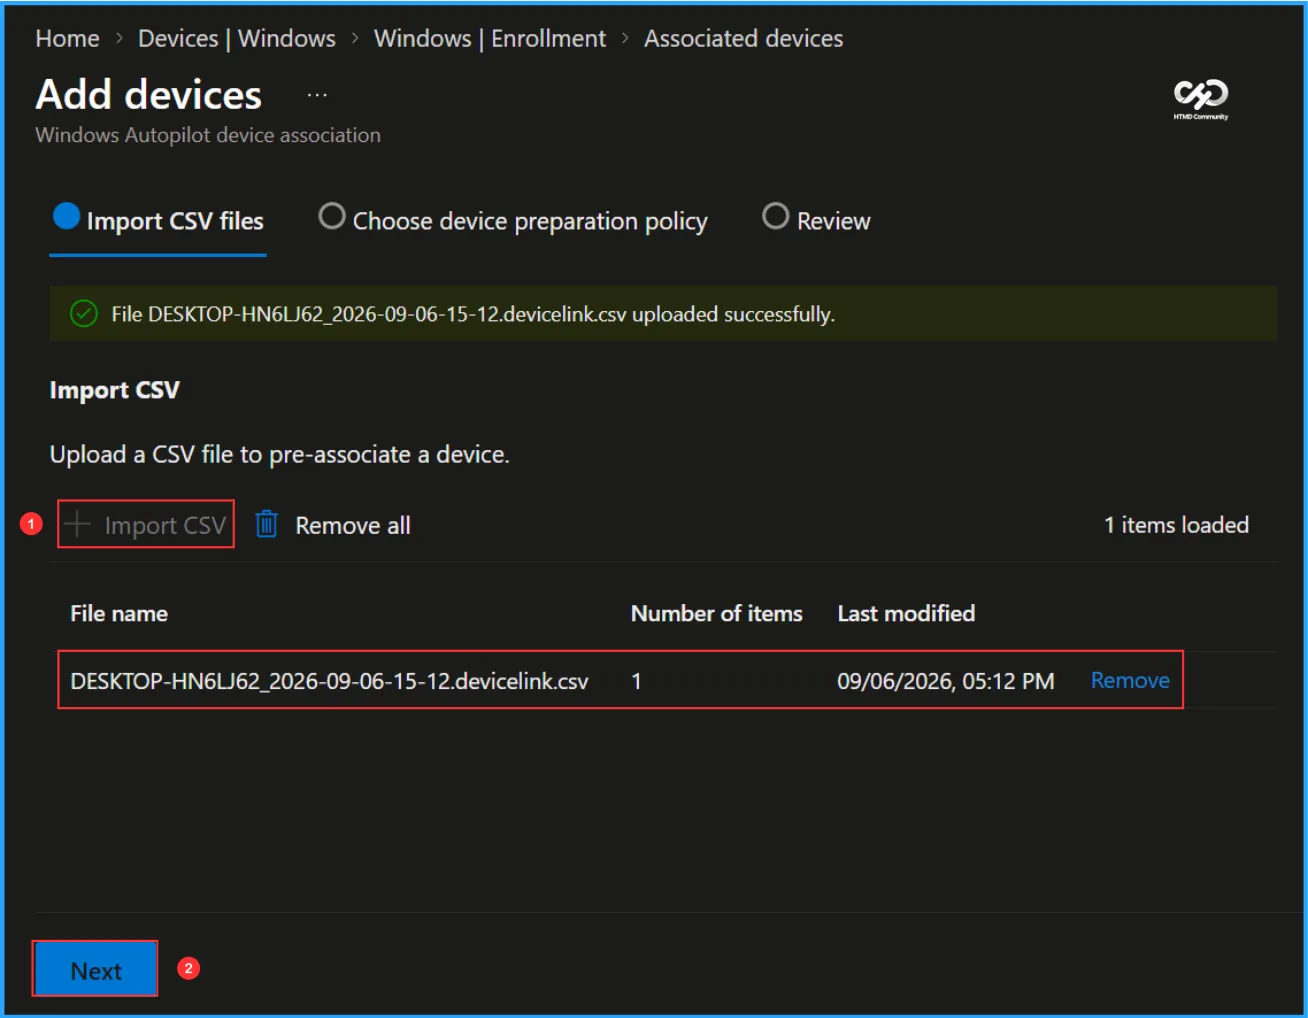
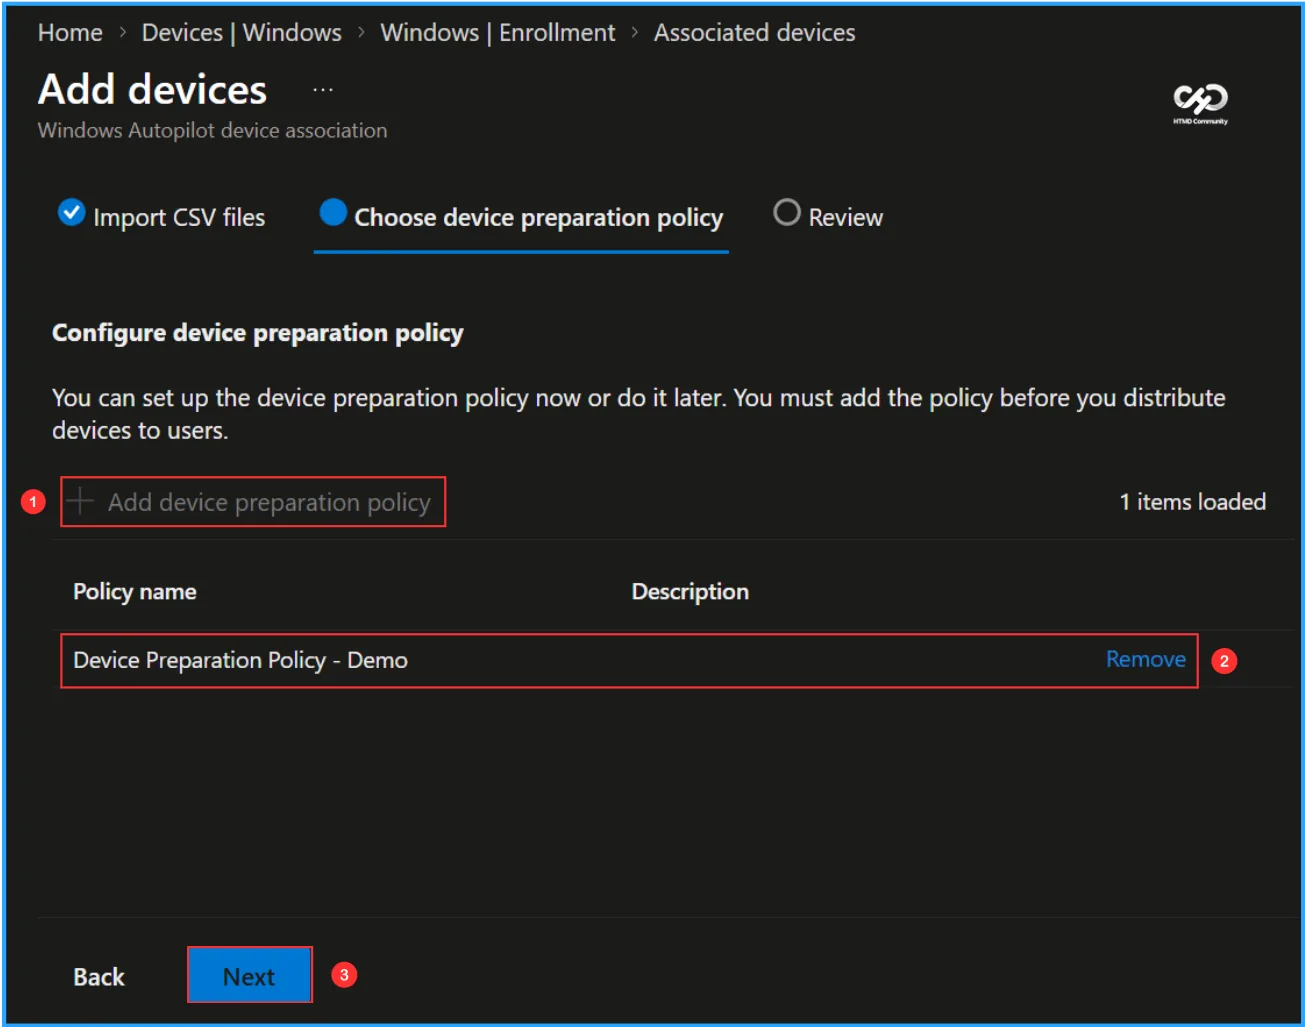
Click Next to continue. On this page, you need to assign a Device Preparation Policy. Select + Add Device Preparation Policy, then search for and choose the policy that was created earlier. You can either assign the Device Preparation Policy now or configure it later. However, the policy must be assigned before the devices are distributed to end users. Once the appropriate policy has been selected, proceed to the next step.
Note: Want to learn how to configure an Intune Device Preparation Policy? Watch my detailed step-by-step tutorial on the HTMD Global YouTube Channel. New Windows Autopilot Device Preparation Experience using Intune.
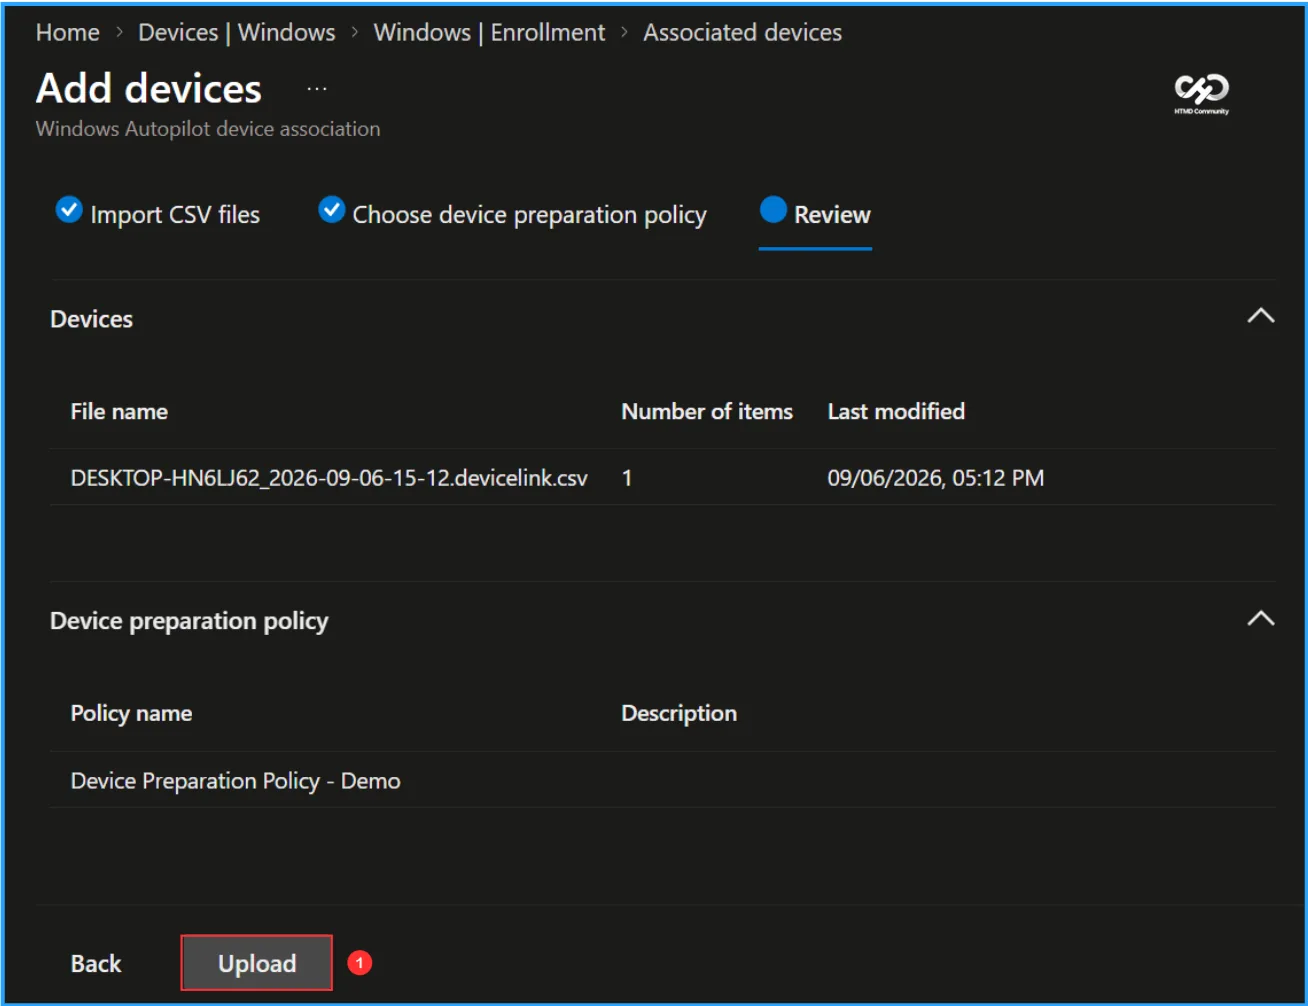
On the Review page, carefully verify all the settings and configurations one final time. Once you have confirmed that everything is correct, click Upload to upload the Device Link CSV file and complete the device pre-association process.
End Result
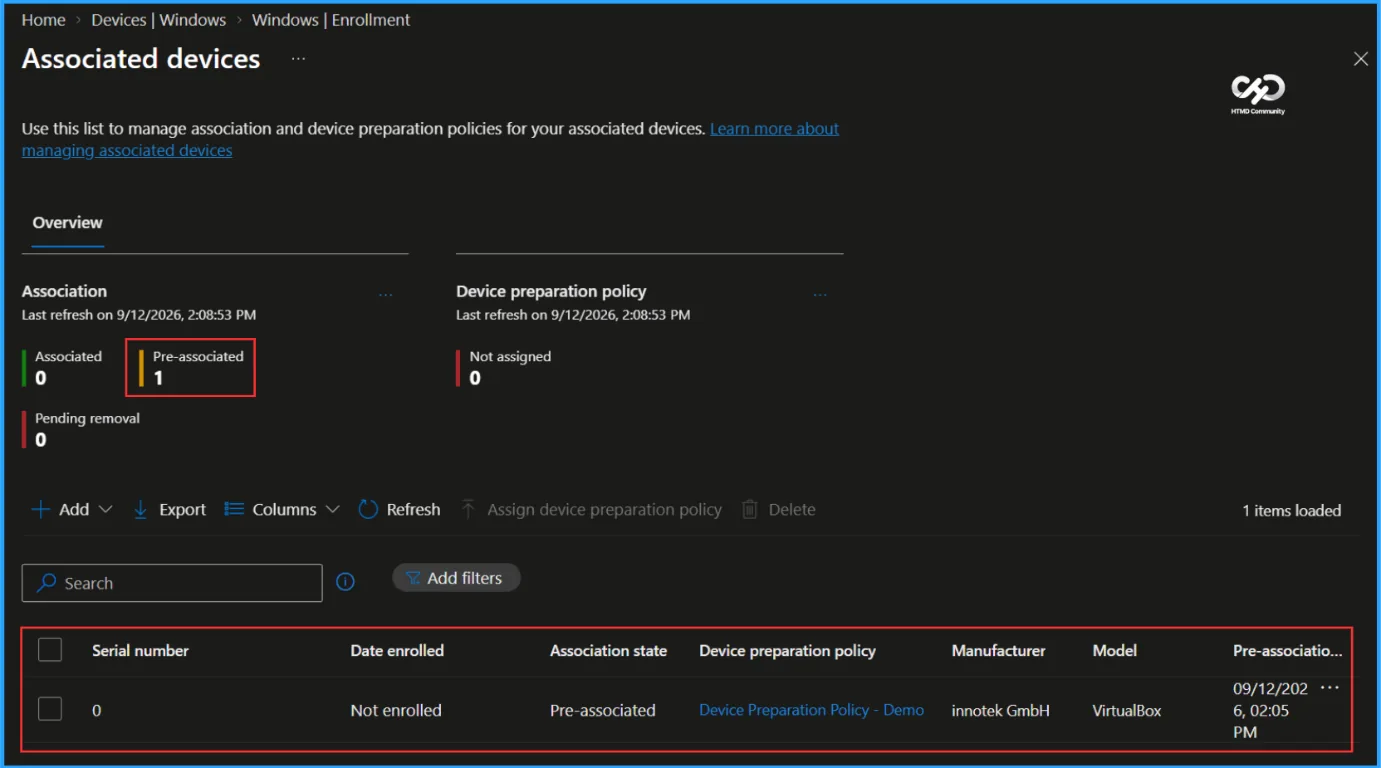
To verify the current status of a pre-associated device, navigate to Devices > By Platform > Windows > Device Onboarding > Enrollment > Device Association. On the Associated Devices page, you can view the total number of pre-associated devices. In this example, the Pre-associated Devices count is 1. You can also see detailed information about the device, including:
- Serial Number
- Enrollment Date
- Association State
- Device Preparation Policy
- Manufacturer
- Model
- Pre-association Date
The presence of the device in the list, along with its associated details and policy assignment, confirms that the device pre-association was completed successfully and is working as expected.
Reference Links
HTMD Consultancy
Get in touch with us to streamline your IT and security solutions. Let us help you fix complex issues and provide streamlined solutions for complex migration projects. Follow us on LinkedIn.